ARDUINO AND LABVIEW
– September 29th, 2010

Yet another industry-level program with it’s own (quick, but useful) tutorial to import Arduino data:
This is a quick (REALLY quick) writeup on establishing a connection between the Arduino Duemilanove and LabVIEW. I used a very simple setup where the Arduino would send its data via serial, and the listening LabVIEW would ‘hear’ it and plot it to a waveform chart. To achieve 2-way communication, the Arduino would listen for a command at the beginning of each iteration. If a command was heard, it would react by turning an LED on or off, depending on the command received. If nothing was heard, then it would continue on through the analogRead() cycle to measure the drop across the potentiometer. The method is inefficient and barbaric, but my intent was proof-in-concept. The concept may be improved upon to increase reliability and efficiency, but I have not had the time to do so.
via [ikLLn6]
ARDUINO AND MIDI: AVBRAIN’S WORKLOG
– September 29th, 2010

Even if you can find many projects using Arduino and MIDI, not many of them are so well described as [zambari] project. The AVbrain controller was developed to stay on top of a complex AudioVisual Hardware scenario.
Found (and supported from day one) on [vjforums], The AVbrain feautures:
- Following MIDI clock
– Recording and playback of 40 note long MIDI sequence
– Sending custom strings of MIDI messages in sync with MIDI clock including:
– CC information to fade video on Edirol V4 (synced to PAL)
– CC information to fade output on Edirol V4 (synced to PAL)
– CC information to fade video layers on Korg Kaptivator (synced to PAL)
– NoteOn data to trigger light flashes via MIDI-DMX converter
– Triggering audio loops on Korg ESX1 so they could be longer than the pattern played on ESX
– Triggering AR and Filter envelopes on Sherman Filterbank
– OneKnob functionality extending Korg ESX1′s ability to only control one part at time. With AV-Brain you could learn a NRPN message, assign it to a knob and use independently of device’s state.
– Fade up or down relative volume of all the channels on ESX1 – Filtering MIDI messages
– All sequencer tracks can be synced to 1/16, 1/8, 1/4, 1/2, 1, 2, 4, 8, 16 or 32 beats
– All sequencer tracks can be re-synced manually and still follow the tempo (to compensate for video delay)
MASSIMO WORKSHOP IN LUGANO – TECARTECOWORKSHOP DI MASSIMO A LUGANO PER TECARTECO
– September 28th, 2010

[Massimo] is going to be in Lugano next week for a one-day workshop [8/10] dealing with Arduino and electronic recycling. The workshop is going to be held in italian, to apply look for the application form on this or write to info@tecarteco.net.
This first edition of the Festival offer a wide variety of events, featuring “body hack” by Daito Manabe – remember? – [UNITXT] by Alva Noto, or very interesting italian artists like [Otolab] or [Teatrino Elettrico].
The Tecarteco event hase three venues, Como Gallarate (IT) and Lugano (CH), and it’s going to be from 30/9 to 8/10.

[Massimo] sarà a Lugano la prossima settimana per un workshop di un giorno [8/10] su Arduino ed il riciclo elettronico. Il workshop sarà tenuto in italiano, per iscriversi – se c’é ancora posto – cliccate qui o scrivete a info@tecarteco.net.
Molto varia l’offerta di questa prima edizione del festival, con – tra gli altri – “body hack” by Daito Manabe – ricordate? – [UNITXT] di Alva Noto, o la partecipazione di artisti italiani come [Otolab] o [Teatrino Elettrico].
ARDUINO 0020 RELEASED FOR WINDOWS AND MAC (SUPPORTS UNO AND MEGA 2560).
– September 27th, 2010
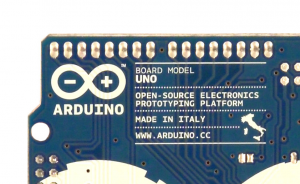
Arduino 0020 for Windows and Mac OS X is now available from the download page. It features support for the new Uno and Mega 2560 boards and a new logo designed by ToDo. The Linux version will follow shortly.
A lot of people helped make this possible, including:
- Dean Camera of LUFA, the lightweight USB framework for AVRs that forms the basis of the USB-serial firmware on the ATmega8U2 on the Uno and Mega 2560
- Zach Eveland who got the 8U2 firmwares working and tested
- Peter Knight of optiboot, the bootloader we’re using on the Uno, saving 1.5 KB of flash memory for your sketches
- Mark Sproul who tested and debugged the ATmega2560 support (including the new stk500v2 bootloader)
- Hans-Cristoph Steiner who developed Firmata, the default firmware on the Arduino Uno and Mega 2560, and Paul J Stoffregen who ported it to the Mega
Thanks to everyone for their help!
On a technical note, the source code for Arduino has migrated to GitHub to facilitate distributed development and merging. It includes the source code for the 8U2 firmwares that we’re using for USB-serial conversion. The issues listand developers documentation will remain on the Google Code Arduino projectfor the foreseeable future.
MAKER FAIRE PRESENTATION
– September 27th, 2010
We found this video at Adafruit’s blog, this is your chance to hear from Massimo, Tom and Dave which are the news from Arduino. Thanks to Johngineer for filming it!!
NEW WEB DESIGN
– September 26th, 2010
During Massimo’s keynote speech at Maker Faire New York, we have taken the opportunity of stopping our server for some minutes to implement the new layout to the server, but also to clean up some things. I am taking the chance to make a quick summary of everything we have been doing during the last two months:
DINNER IS READY
– September 24th, 2010
A few days ago we wrote on our website “We are cooking something new for you”.
Well, dinner is ready…
Saturday 25 September represents the beginning of a new era for Arduino.
During Maker Faire NYC we’re going to unveil to the world a lot of changes happening to the Arduino Project.
Un po’ di tempo fa abbiamo scritto sul nostro sito “stiamo cucinando qualcosa per voi”.
Beh, il pranzo é servito…

Sabato 25 Settembre 2010 rappresenta l’inizio di una nuova era per la scheda Arduino.
Durante la Maker Faire di New York sveleremo i numerosi cambiamenti del Progetto Arduino.
INTERACTIVE ARCHITECTURES: MEDIA-TIC AND INTERACTIVE BUILDINGS
– September 24th, 2010

Some time ago I was informed that the surfaces of the amazing Media-TIC building (from Cloud 9 / Enric Ruiz Geli) were Arduino-based, sensing the enviroment/atmosferic changes and offering a 20% saving on climate control:
The building is in the shape of a cube and formed by large iron beams covered in a plastic coating of inflatable bubbles, which offer glimpses of the fluorescent structure of the building. The attractive covering also has a functional utility as a way of regulating light and temperature, primarily preventing 114 tons of CO2 a year from escaping from the building, and offering a 20% saving on climate control.Every facade of the Media-TIC is different: from the outside, they reveal parts of their interior spaces and give a diverse plasticity, while from the inside they offer spectacular views.
Importing enviroment data from Arduino to Rhino and other 3D programs has become easier with the creation of [GrassHopper] and its practical toolbar [FireFly].
New ways to conceive our spaces, a new use of energy, the upcoming concept of [active houses] are just around the corner. My question is: how can we get rid of 50 years of misuse (misunderstanding?) of architecture?
A new age is coming, maybe.
ARDUINO BREATHALYZER: CALIBRATING THE MQ-3 ALCOHOL SENSOR
– September 23rd, 2010

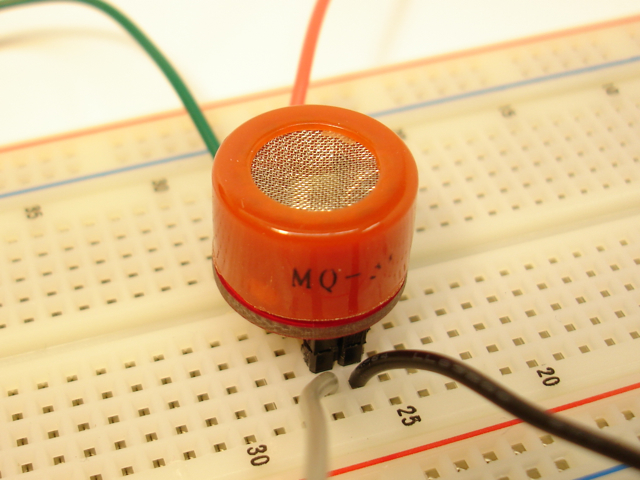
[Nootropic Design] explains the use (and the approach) to one of the most interesting sensors I’ve seen lately: the MQ-3 alcohol sensor:
The MQ-3 is an alcohol gas sensor that is available for about $5 from Sparkfun,Seeed Studio, and others. It’s easy to use and has sparked the imagination of anyone who has dreamed of building their own breathalyzer device for measuring the amount of alcohol in the human body. I got an MQ-3 sensor a couple of months ago and have spent a lot of time trying to figure out how to do this. After lots of “data gathering”, I found that this task is not as easy as it sounds.
The electronic circuit is explained and Standard Firmata used to visualize the data in Processing.
The most interesting part in the article is when [Michael] tries to calibrate the sensors, by calculating the BAC (blood alcohol content).
It’s really hard to calibrate this sensor for even an approximate BAC reading. It’s even difficult to correlate readings to looked-up BAC values. There are many environmental factors that affect the resistance within the sensor (humidity, temperature, oxygen concentration), and this is only a $5 device anyway. And as evidenced by the lack of consistency between online BAC calculators, there’s not even concensus about how to compute BAC. Law enforcement agencies have much more sophisticated breathalyzers, and often rely on actual blood tests or urinalysis for evidence.
Nevertheess [Michael] provides sketches, codes and everything to make the sensor work. You can’t always expect that precision from a 5$ sensor. Thanks a lot, we really appreciate your work: this is the more complete MQ-3 guide up to now.
via [nootropic]
OPTOCOUPLER DEMYSTIFIED
– September 22nd, 2010
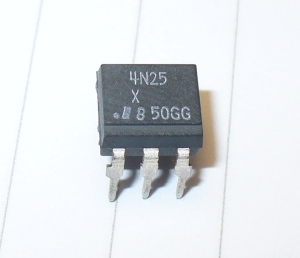
[tronixstuff], who has wrote a ton of arduino tutorials, has posted a detailed guide to one of the most useful electronic components, used to trigger many low-voltage circuits: the Optocoupler.
It is a small device that allows the transmission of a signal between parts of a circuit while keeping those two parts electrically isolated. How is this so? Inside our typical optocoupler are two things – an LED and a phototransistor. When a current runs through the LED, it switches on - at which point the phototransitor detects the light and allows another current to flow through it. And then when the LED is off, current cannot flow through the phototransistor. All the while the two currents are completely electrically isolated (when operated within their stated parameters!)
via [TronixStuff]


0 comentarios:
Publicar un comentario