ARDUINO CONTROLLED ROBOT INAGURATES MALMO’S FABLAB
– April 5th, 2011
The robot in the video is Kiwi Drive, developed by Malmo’s Hakerspace (Forsknings Avdelningen) in a total time of 1,5 weeks. The crew started assembling it at a hackathon we held at our FabLab in February and the robot got the honor of presenting the official opening of our brand new space to the public on March 31st. I runs on a laptop an includes an Arduino Uno to control the motors.
Once the project began design stage we realized that focusing on making it easy for others to reproduce was a good idea. Therefore we choose to use nothing but standard components. Nema 23 stepper motors and drivers are standard, cheap and common due to the increase in DIY CNC and Reprap manufacturing. The Arduino Uno is available across the world. We also only use metric standard components (sorry about that US) such as M5 threaded rods and M4, M3 screws for the smaller components.Omnidirection wheels however are not exactly standard components, but given the simplicity of the drive mechanism it would be very easy to adapt the design for other wheels and shafts of a similar size. We have also made sure it is easy to re-design the drawings to account for other types of motors and bearings and we’ve left significant space (length-wise) for larger motors and gearboxes.
Find more information about Kiwi Drive on it’s official development wiki, also take a look at this hilarious post by the Hackerspace members about moving their offices to Malmo’s City Hall.
WHATEVER HAPPENED, HAPPENED
– April 5th, 2011
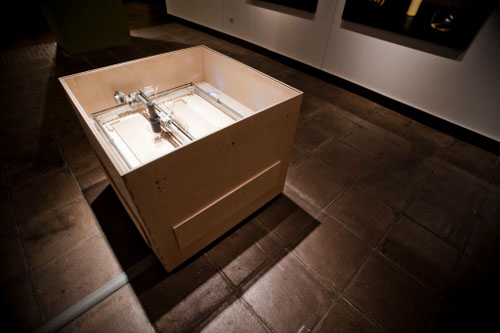
“Whatever happened, Happened” is the title of Daniel Palacios’ latest work(WhH), powered by an Arduino Uno, representing the flow of time, how hard it is to stop it, and the human need for a point of reference to compare to. In his own words:
WhH is a machine which creates growth rings in a section of virgin wood, so that we may be part of a process which we believed before to be foreign to us, because we weren’t capable of perceiving it.The machine engraves concentric rings in the wood surface by laser, so that the result is closer to reality than a computer-generated graphic. It is just as important that the graphic is realised slowly over time, involving external factors which could affect the process, separating us from the instantaneousness of a printer in order to understand the process that it is giving at that exact instant, while confronting the vision we are accustomed to, because we will always be able to make a comparison with the rings that it already drew at the moment of our visit.Every day the machine begins drawing a new ring, taking as a reference point the shape of the previous one from the day before. However, the distance of this and variation of its perimeter with be directly tied to the number of people in the hall and their movements; this will also affect the number of passes the machine makes over the ring throughout the day, thus influencing its thickness and depth.
Daniel is known for his pieces including microcontroller technology. His first solo piece Waves that represented sound physically ran on an Arduino Diecimila using a bunch of PIR sensors and some relays, OutComes was a collection of human-size antennas made of pipes that would play depending on how people affected the electromagnetic field of a room stuffed with those (he made his own Arduino derivatives for this project), and now WhH is a self-made laser engraver replicating the growth of a tree running on Arduino Uno that reads information from the room.
Something I like from Daniel’s work is that he is happy to share. All his pieces come with the technical description on how he made them. And a CC-SA-NC license that will allow you replicating his work. This link will give you the information about WhH.
For more information, visit Daniel Palacios’ website.
LECTURE OF ZACK FROM MAKERBOT @ FABLAB ITALIA
– April 4th, 2011
I’m very pleased to announce Zack Smith’s lecture in Turin, Italy, next saturday, in our new born Fablab. The lecture is going to be streamed, so you can follow it from the internet (sat 9 april 2011, from 14:30 on CET). More info soon!
via [fablabItalia] twitter [@Fablabitalia]
INDIA ON THE PRESS
– April 4th, 2011
I landed yesterday in Bangalore and two things happened. First, India won the World Championship in Cricket … that is big … second, Arduino’s Indian distributor 9circuits was featured on liveMint.com (a partner to Wall Street Journal) … to me, that is bigger, specially considering the length of the article -devoted to the DIY culture and how it opens up for innovation-.
Nandeep Mali, Harry Samson, Priya Kuber and Pronoy Chopra are the founders of 9 Circuits, an online store that hopes to kickstart the country’s fledgling do-it-yourself (DIY) hardware community. Hardware engineering includes everything from building prototype vehicles to experimental gadgets. The store sells an entire range of programmable Arduino Boards (the engineering foundation for everything from a robot to a GPS module), hardware components, sensors and spare parts.
It operates out of a single room on the first floor of a shopping complex in east Delhi’s Mayur Vihar. Their unlikely neighbours include a detective agency called Omniscient Detectives. Inside the 9 Circuits office are four desks arranged haphazardly, stacked with miniature mountains of electronic components. “Everything is about software here, so the hardware hobbyists in India are largely fragmented. There’s lots of knowledge but very little networking,” says Mali, rooting through a box of touch screens. “The entry barriers become very heavy.”
The part dedicated to 9circuits is actually quite interesting, there is even room for Priya to advocate for a better gender distribution in the world of hardware and technology. That we want as well:
“When you study abroad, every student is exposed to some broader arm of DIY culture,” Kuber says. “We want to recreate that atmosphere. Create documentation and videos that can be replicated locally.” While detailed instructions exist on the Internet for just about every conceivable engineering conundrum, many of these assume that you’re living in a society with easy access to specific components. “Try going to a hardware store and asking for an M3 screw,” Kuber says. “They’ll blink.”Kuber conducts workshops on DIY at engineering colleges around north India, and wants to encourage more women to take up hardware engineering. “The problem here is that there are middlemen and organizations willing to sell you complete college projects, so a lot of people don’t have to solder a thing to get through the system.”
HIDUINO: ARDUINO TALKING MIDI
– April 1st, 2011

Some time ago [ant.b] from the Arduino Forum manage to reflash the Atmega8u with other LUFA Firmwares. [Dimitri Diakopoulos] has recently developed a similar approach for his HIDUINO project. Very good explanation & references. Diakopoulos succeded to make Arduino show up as a MIDI Device:
LUFA powers the HIDUINO project in that it handles most of the low-level USB-HID implementation while exposing an API for developing other HID-compliant devices like MIDI.The USB-HID specification has a specific type for MIDI input and MIDI output, which nearly all commercial musical controllers on the market use for class-compliant (driverless!) MIDI I/O.
Check out guide for ISP flashing, on the project page hosted on googleCode.
ARDUINO CANDY GRABBER, WEB CONTROLLED.
– March 31st, 2011

A step-by-step guide on controlling physical things (like grabbing candies with a mechanical arm) via Internet (please, try!).
In this instructable you will learn how to connect to your arduino and control it over the net, set up a video stream, and how to control stuff with your arduino all in realtime. I’ll try to show you on a concrete example how this could be done, but the code I used and wrote is going to be generic so you can use it for your projects. Note that I haven’t discovered anything new but rather used code that I found lying around the net, built from it and changed it fit my needs.(…) So how should it work? The idea is that there is a Flash AIR app on my home computer that when a remote client connects to it starts the video broadcast. The communication between the client and the AIR app would be through a PHP socket because it can instantly push messages from one to the other. The socket will handle all the clients and the queuing. The Red5 server is used to handle the video broadcast, stream the video and send the arduino commands from the client that is first in the queue to the AIR app (although it could do so much more… we’ll talk about that in a later step). Finally TinkerProxy is used to send commands from the AIR app to the arduino that is connected to the same computer.
Thanks to Mario for the link!
via [Instructables], grab the thing [here]
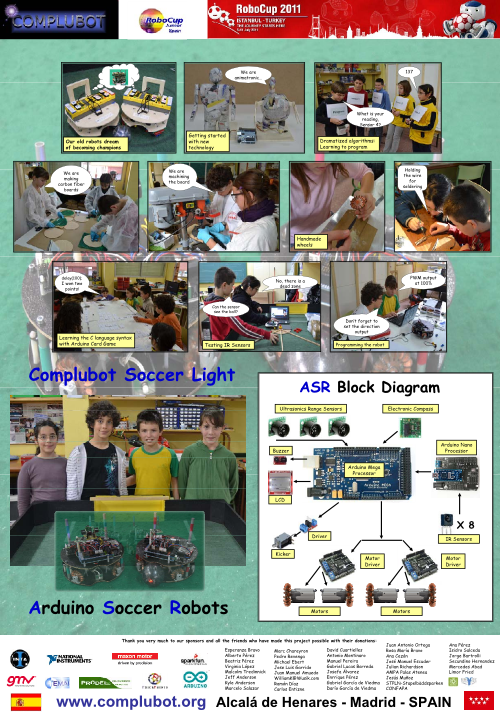
POSTER: MULTIPROCESSOR ARDUINO ROBOTS (MADE BY KIDS)
– March 29th, 2011
SPANISH INTERVIEWS ABOUT ARDUINO
– March 29th, 2011
In the last couple of weeks I have been interviewed a couple of times about the development of the Arduino project, the future of the platform, the importance of Open Source Hardware, and the implications of open licenses. If you understand Spanish you might be interested in listening to this podcast by Jorge Barrientos, or reading this article by Alan Lazalde.
You can also follow the podcast directly on our website: Entrevista a David Cuartielles @ Medialab Prado 25-03-2011 by laguna
SAMSA II, THE HEXAPOD
– March 29th, 2011
[pabloxid] shared an Hexapod project on the forum based on an Arduino MEGA 1280 and 18 Dynamixel AX-12 motors:
SAMSA is based on the Wiring board, with an ATmega128 microcontroller, and SAMSA II on the Arduino Mega, with an ATmega1280. Both are pretty similar, tough the ATmega1280 has 8 KB SRAM, twice the ATmega128. For SAMSA II the Arduino IDE was not used. The software was written directly in C++, using some libraries from both Arduino and Wiring.SAMSA II has also two additional microcontrollers. One is an old Arduino Mini(ATmega168) located in the head, tasked with handling the sensors. The other is an ATmega8 and is integrated in the display. The firmware in the display was replaced with another one, freeing the main microcontroller from handling the display pixel by pixel, storing the frame buffer, etc.The head’s microcontroller is responsible for sampling, filtering and processing sensor’s data. The data from the Sharp distance sensor and the lateral IR sensors are combined in a single “super smart distance sensor”. This microcontroller also decodes the data coming from the 38 KHz IR receiver, used for the Remote Control.These two additional microcontrollers further reduce the load on the main microcontroller, allowing for more sophisticated behaviours.
MASSIMO ALLA FONDAZIONE RUMOR, VICENZA.
– March 29th, 2011
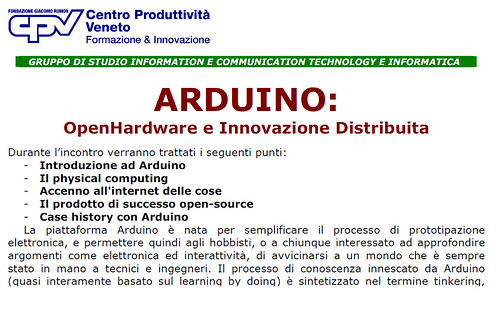
Massimo é stato invitato dalla [Fondazione Giacomo Rumor] – Centro Produttività Veneto – a spiegare Arduino e l’innovazione distribuita dell’Open Hardware. L’incontro, di due ore, si terra a Vicenza giovedì 31 Marzo, alle ore 18:00, presso il Viest Hotel (Strada Pelosa 121 – Vicenza).
Vi aspettiamo numerosi!


0 comentarios:
Publicar un comentario