EDIBLE ARDUINO AT NYC
– February 22nd, 2012
The makers at Rockwell group, based in NYC, threw a little studio party this week.
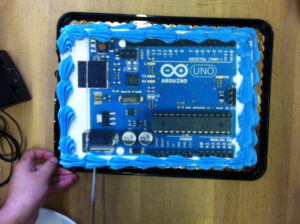
For the occasion, an edible Arduino Uno was served. The Lab members’ Analog taste buds values were HIGH. The lab member who ate pin 13 was blinking in a loop, while the member who ate the reset button required some troubleshooting. In the end, all were left with a taste for creating more interactive objects and environments with the Arduino prototyping platform.
Awesome spirit people! 
INTELLIGENT WATER SPRINKLER
– February 21st, 2012
‘FEEL’ THE TEMPERATURE USING CRYOSCOPE
– February 20th, 2012
Thermometers are superb at measuring temperature but lousy at describing it. A bulb of mercury tells me it’s 55 degrees–but what’s 55 degrees? When was the last time I walked into a room and said, “This place feels exactly 55 degrees.”
The device was created by Robb Godshaw of Syyn Labs.
Syncing with Wi-Fi to online weather reports, you can touch this aluminum cube to actually feel the outside temperature rather than simply reading about it through numbers or whimsical sunshine icons. “I sought to develop a device that conveyed the forecast in a manner which left nothing to the imagination,” Godshaw tells us. “It provides a thorough and instantaneous understanding of what awaits the user outside.”
Technically, the 4-inch milled aluminum cube is stuffed with quite a bit of hardware, including an Arduino that controls a Peltier element and a heat sink, which work in tandem to pump heat appropriately. After the first weather sync, it’s just a few minutes before the device comes to temperature.
The temperature ranges from 0°F (-18°C) to 100°F (38°C) which is clearly a decent measure of the hot and cold.
[Via: Fastcodesign and robb.cc]
ANDROID APP TO CONTROL ARDUINO
– February 20th, 2012
This new android app in the the market enables you to communicate to your arduino using an WYSIWYG kind of interface using a bluetooth shield.
Features:– discover and connect to Arduino board with Bluetooth shield
– display board firmware version, name and Firmata protocol version
– set pin mode (analog/digital input/output, pwm)
– get/set pin values
– LED and pin mode animation
– read messages from the board (Firmata String Sysex message)
– beautiful WYSIWYG interface with 320×480, 480×800, 480×854, 1024×600 and 1280×800(?) screens support
– no special sketches required (only slightly modified StandardFirmata sketch from Arduino IDE examples bundle)
– Free, no ads
The further details can be read here.
[Via: AndroidMarket and AnettoSoftware]
THE ARDUINO DOCUMENTARY
– February 20th, 2012
The story of arduino from a concept to bringing a new genre to open source hardware revisited! A documentary directed by Rodrigo Calvo and Raul Alejos.
[Via: arduinothedocumentary.org]
HOW TO MAKE A SHIELD FOR YOUR ARDUINO
– February 17th, 2012
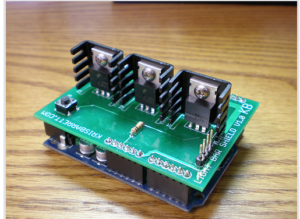
As a hobbyist, we often want to extend the functionality of our arduino board. In order to minimize wires and maximize functionality, we design special need-based ‘shields‘. A useful step by step tutorial that I found here , breaks down the process into the following stages:
1) Part selection
2) Prototyping the board
3) Schematic design
4) PCB Layout
5) PCB Fabrication
[Via: krisbarrett]
MEXICO REPORTING: DON INGENIERO AND HIS ANTI-SHIELD
– February 10th, 2012
I spent the day in Mexico City buying components for my forthcomingEuroaxacan workshop in electronics and software for craftsmen. I usually get here fairly cheap wheels for my robots, nice soundspeakers for building music instruments, wire -lots of wire-, great responsive buttons and some other stuff. I try to avoid LEDs, since they are more expensive than in Europe … those and the Arduino boards I bring from home. I usually get them at Electrokit, which is very close to my studio in Malmo.

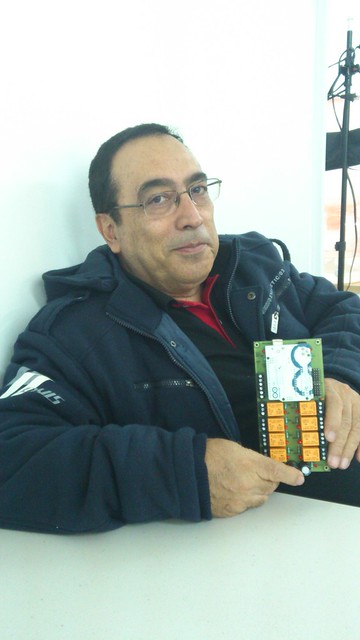
(c) 2012 D. Cuartielles, Don Ingeniero showing off his Anti-Shield
The street where to find the electronics in Mexico is called Republica del Salvador. In about 100 meters you can find more or less everything you need: motors, potentiometers, wire, USB cables, breadboards, Atmega8L … but also, since two years ago there is Electronica Estudio, our only distributor in the city. I like passing by to visit to Don Ingeniero (Mr. Engineer) or how I like to call him. We usually speak for a while about the future of the platform, I get to see his designs and we plan for forthcoming events (beware, I will be making something during the Easter week at Electronica Estudio).
This time, Don Ingeniero flashed me with one of his biggest sales. He likes to call it the anti-escudo (Spanish for: anti-shield). It is a shield with 8 relays and 3 pin connectors for servo motors. He of course realized that a lot of people just want to hack their home appliances, so his local factory is making a lot of those anti-shields. The reason behind the name? That he decided to put the board upside down. Don thought I wouldn’t like it … the fact is that I loved it, yet another reason to show ToDo’s great design on the boards. You can see it is Arduino even from the back.
Next I will leave for Oaxaca to run a workshop at the Talleres Comunitarios de Zegache until February 22nd, 2012. If you are around the area and want to hang out, just drop me a line at d.cuartielles AT arduino DOT cc, or @dcuartielles on twitter.
TWEETING IN MORSE CODE
– February 7th, 2012
For those of you who are addicted to merge new technologies to interface-archeology here is a new ‘Tworsekey’. A vintage looking tweeting device which takes input in the form of morse code and tweets the output. It features arduino and the ethernet shield. The sketch can be downloaded from here. Needless to say that the design is open sourced.
In case you want to build it, the design details can be obtained from here.
Via: Gizmag
CIRCUIT MILLING WORKSHOP WITH MASSIMO
– January 27th, 2012
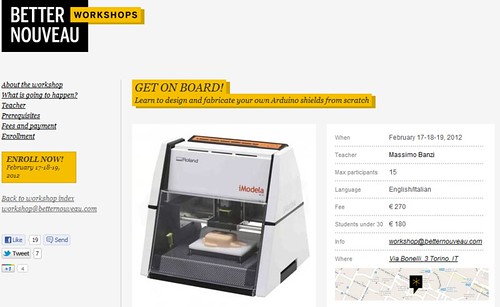
BetterNouveau is organizing a promising workshop about circuit milling withRoland iModela in Turin. Massimo is going to walk you around milling your own shield.
[...] you’ll learn to design and create your very own Arduino shield (‘shields’ are boards that can be plugged on top of the Arduino extending its capabilities). We’ll start from schematics, create the layout and make real prototypes on-site: become a pro Arduino user and learn to design circuits with the Eagle PCBsoftware and make your own Arduino Shields using the Roland iModeladesktop milling machine. D.I.Y shields are the best way to move your project from a breadboard-based approach into a professional prototype.
The Workshop is held on February 17-18-19.
via [Better Nouveau]
APRONO LE OFFICINE ARDUINO
– January 25th, 2012
Una mattina di più di un anno fa ho ricevuto una telefonata di Riccardo Luna, una delle sue in cui ha un’idea un po’ pazza, che sai che se dici di sì ti metti nei guai ma alla fine ne esce qualcosa di importante.
A Riccardo avevano appena affidato la curatela della mostra Stazione Futuro, l’unica, tra tutte le mostre organizzare per celebrare i 150esimo dell’Italia, che cercava di vedere nel futuro.
Parlando di futuro del lavoro voleva mettere in mostra Arduino come esempio di quando uno si inventa un lavoro da sé. Mi piaceva l’idea ma bisognava inventarsi qualcosa di diverso, qualcosa che non fosse una teca con dentro una scheda ma uno spazio vivo dove spiegare che ci sono dei modi nuovi di inventare e fabbricare.
Nacque così il FabLab Italia: Arduino ha acceso la scintilla iniziale, il comitato Italia 150 ha risposto in maniera lungimirante, un gruppo di persone capaci ha lavorato intensamente per crearlo, i ragazzi ci hanno messo l’anima per farlo funzionare per otto mesi.
Il FabLab è stato uno spazio che ha creato una piccola comunità di persone interessate a capire come si possano inventare nuovi processi produttivi, nuovi modelli di business partendo dalla fabbricazione digitale, dall’open source e dalla collaborazione tra persone.
Abbiamo spiegato ai visitatori le nuove possibilità di queste tecnologie, abbiamo introdotto alcuni studenti di architettura al mondo della fabbricazione digitale, abbiamo tenuto un numero consistente di corsi sui temi più disparati, abbiamo partecipato a diversi eventi cittadini, abbiamo invitato persone da diverse parti del mondo a portare il loro contributo ma soprattutto abbiamo fatto circolare le idee, abbiamo riacceso gli entusiasmi, abbiamo creato un gruppo di persone fiere di essere Italiani.
L’esperienza si è conclusa il 20 novembre ma per noi era importante mantenere acceso il fuoco dell’entusiasmo creato in questi mesi e abbiamo pensato a come portare avanti l’esperienza dandole una nuova forma che si possa sostenere con le proprie gambe.
Ci è saltato in mente che Arduino poteva fungere ancora da “incubatore” di idee nuove: le macchine ci sono come c’è la voglia di creare uno spazio dove raccogliere dei talenti per sviluppare nuovi prodotti. Fortunatamente abbiamo trovato sulla nostra strada il partner perfetto per chiudere il cerchio: il co-working Toolbox a Torino si è dato disponibile a darci uno spazio per 18 mesi e da li sta nascendo Officine Arduino.
Officine Arduino è una nuova azienda basata a Torino, incubata da Arduino, che da un lato svilupperà nuove idee e prodotti “open” e da un altro farà da “nido” al nuovo FabLab Torino.
Ci piaceva il nome “Officine” per richiamare il sapore delle vecchie piccole aziende italiane che dal nulla si sono inventate di tutto.
Un’azienda nuova, una combinazione di Azienda, FabLab e Makerspace unica nel mondo per credere nei giovani talenti torinesi.
Si parte oggi con questo annuncio, il lavoro è in corso a pieno ritmo, ci vediamo il 17 Febbraio alla festa d’inaugurazione presso ToolBox Torino via Agostino da Montefeltro 2.
Nel frattempo date un’occhiata alle offerte di lavoro delle Officine. (WebMaster/ PHP Developer Guest Blogger Internship // Junior Electronics Engineer)
Ringraziamenti:
Ringraziamo il Comitato Italia 150 per averci permesso di creare il primo FabLab Italiano. Riccardo Luna, Paola Zini, Sara Fortunati e Pamela Pelatelli, Sara Bigazzi, Cesare Griffa, Enrico Bassi, Lorenzo Romagnoli e Matteo Tangi per tutto il lavoro che hanno fatto che ci ha permesso di creare e far funzionare il FabLab in maniera splendida per 9 mesi.
Ringraziamo il Comitato Italia 150 per averci permesso di creare il primo FabLab Italiano. Riccardo Luna, Paola Zini, Sara Fortunati e Pamela Pelatelli, Sara Bigazzi, Cesare Griffa, Enrico Bassi, Lorenzo Romagnoli e Matteo Tangi per tutto il lavoro che hanno fatto che ci ha permesso di creare e far funzionare il FabLab in maniera splendida per 9 mesi.
Davide Gomba che ha abbracciato questo progetto investendoci una quantità immane di energie personali ed accettando la sfida di diventare un’imprenditore guidando le Officine Arduino Torino.
Enrico Bassi che ha guidato splendidamente il FabLab in questi mesi ed ora si prende in carico il nuovo FabLab Torino oltre che collaborare con Officine Arduino.
Toolbox che ha condiviso la nostra visione su come cambia il mondo del lavoro e come si poteva sperimentare con qualcosa di nuovo in Italia.
Massimo e Davide


0 comentarios:
Publicar un comentario